Filter Bag Wear Patterns: How to Diagnose Cage Abrasion, Blinding and Dust Leaks
Filter bag wear patterns help narrow the cause when a dust collector leaks dust, loses differential-pressure stability or consumes bags faster than expected. Record where the damage begins and which direction it follows. Those details can point to a mechanical or operating issue that a like-for-like replacement would leave unresolved.
A removed filter bag is useful evidence. Top holes, vertical wear marks, lower-side tears, circumferential breaks, hard dust cake and even a bag that appears undamaged can each point to a different place to inspect. This guide uses common field wear patterns to help maintenance teams collect the right evidence before ordering replacements.
Reading filter bag wear patterns: location and direction
Before removing every bag, photograph a representative sample in place and label its collector row or compartment. Then look for three clues: the damage location (top, body, lower section or bottom); whether the tear appears to have developed from the interior outward or the exterior inward; and whether the same mark repeats at the same height or on the same side of several bags.
Repeated damage at one position is rarely random. It is often the physical map of a cage defect, an off-centre pulse, poor fit, excessive bag movement, abrasive inlet flow or a collector component that is contacting the bag.
1. Top or Collar Wear: Inspect Pulse Alignment, Tube Sheet and Top Fit
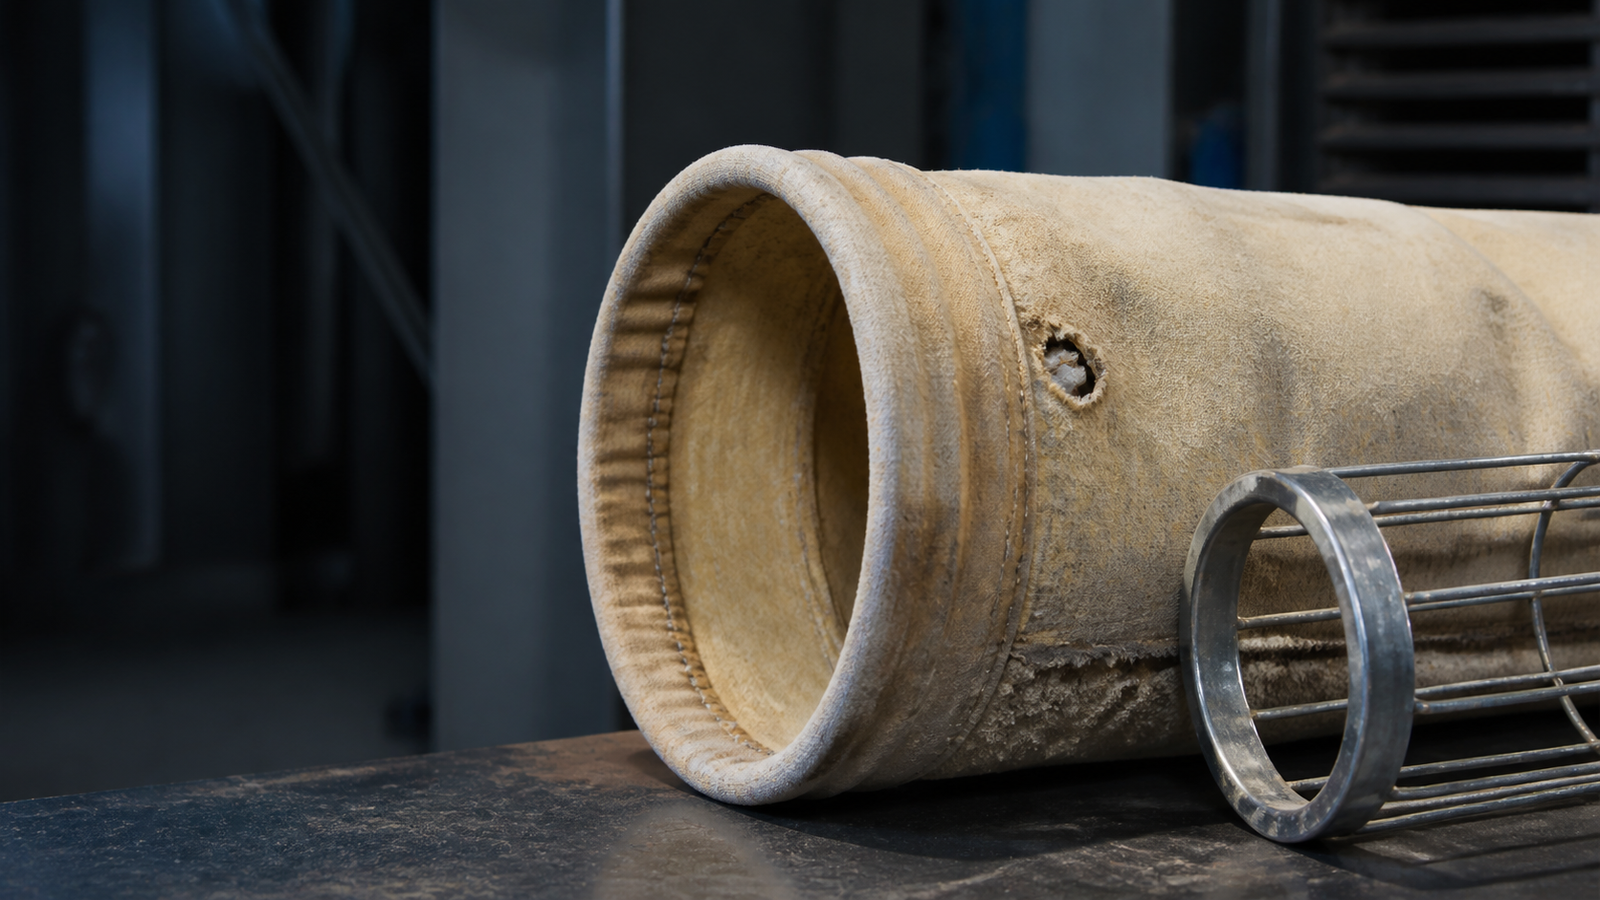
Wear near the bag mouth—often within the first few hundred millimetres below the collar—deserves prompt attention. Holes or local erosion in this zone can occur when the cleaning pulse is too aggressive, the blow tube is misaligned, or the bag repeatedly rubs against a distorted tube sheet or adjacent hardware.
The bag surface may first lose its finish, then expose the base fabric, and finally develop a hole. When this pattern is concentrated on one side, do not assume the media itself is weak. Check pulse-jet pressure, duration and cleaning frequency; blow-tube position and nozzle alignment; tube-sheet flatness and hole condition; and snap-band, cuff or collar fit.
2. Bag-Body Wear Along a Cage Wire: Separate Cage Damage From Cleaning Stress
Longitudinal wear lines or holes that coincide with cage vertical wires are among the clearest diagnostic patterns. They commonly indicate that the bag is being rubbed at a fixed contact point.
If the damage appears to have developed from the inside outward, inspect the cage for broken welds, rough wire ends, corrosion, burrs or a missing vertical wire. High pulse pressure or overly frequent cleaning can make the bag fold sharply at the same contact point and accelerate the damage. If the damage appears to have progressed from the outside inward, look for a bent or distorted cage that is pushing the bag into an abnormal position.
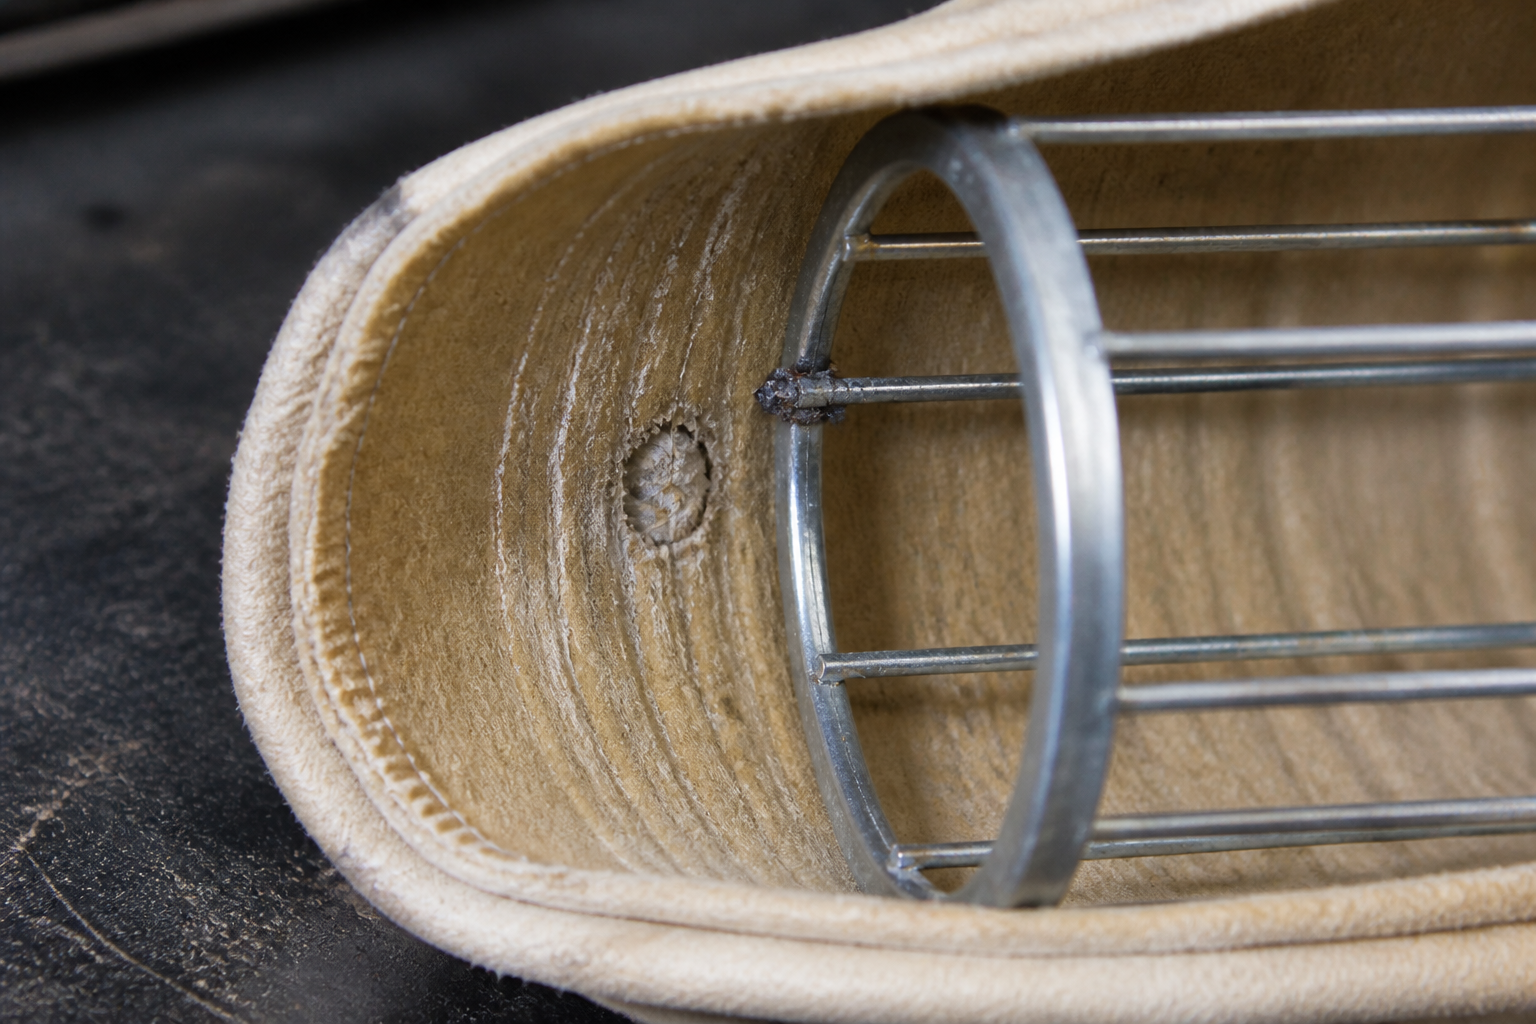
Replacing only the bag in either situation usually repeats the failure. The cage should be checked for diameter, straightness, weld finish, ring spacing, wire condition and compatibility with the bag construction. See the filter bag cages guide for a detailed cage-inspection checklist.
3. Lower-Side Wear: Check the Tube Sheet, Bag Length and Collector Clearance
Damage on one side of the lower bag section—often concentrated within roughly 300 mm of the bottom—can indicate an installation or clearance issue. The most worn portion may be at the lowest point, with the damage becoming lighter further up the bag.
Common inspection points include a deformed tube sheet or plate with holes that are too close together; a cage that is bent, too large or otherwise out of specification; bags that are too long for the collector; and contact between the bag and hopper, wall or internal component. Compare several failed bags with the tube sheet, cage and collector interior. The same lower-side pattern across a row of bags points to a geometry or clearance problem.
4. Circumferential Breaks Near the Bottom: Review Velocity and Abrasive Dust
A ring-shaped failure near the bottom can develop when one local break is continually scoured by high gas velocity or abrasive dust. The damaged edge acts as a starting point; as the dust stream continues to hit it, the tear can spread around the bag.
Review inlet flow direction, air-to-cloth ratio, actual flow distribution, dust hardness and particle size. Where bottom wear is documented, a reinforced bottom construction may be specified as part of the solution. It should be combined with a correction to the airflow or mechanical cause, rather than used as the only response.
5. Internal Wear From Excessive Bag Movement: Measure the Cage-to-Bag Relationship
Filter bags need a controlled relationship with the cage. If the cage outside diameter is too small relative to the bag’s inside diameter, the bag can move through a large amplitude during pulse cleaning and filtration. Repeated flexing and rubbing may produce interior wear, especially around cage contact points.
Corroded cages make the problem worse. After corrosion, rough oxide and sharp edges can behave like abrasive paper against the felt. Measure the bag and cage as a matched assembly. Replacing a poor-quality or corroded cage is often more effective than changing to a more expensive filter medium.
6. Blinding, Caking and Plugging: Do Not Confuse a Dust Cake Problem With a Tear
Some bags do not develop a clear hole at all. Instead, they become stiff, heavily coated or blocked with a hard dust layer. Field examples often show a combination of sticky dust, condensation and compacted cake around the bag surface or bottom.
High-temperature duty alone does not automatically cause blinding. The useful question is what happens during the full operating cycle: does gas temperature pass through the dew-point range during start-up, shutdown or upset conditions; is moisture, oil mist or a sticky component entering the collector; is the cleaning system supplying the right energy; and does the dust release from the current media and finish?
For a deeper troubleshooting sequence, see Filter Bag Blinding and Hard Dust Cake and what to check when dust collector pressure drop is too high.
7. When Emissions Stay High but the Bags Look Intact: Inspect the Duct and Collector Shell
Not every dust-emission problem is a filter-bag leak. In one cement-plant field inspection, a damaged duct-wall plate—not the filter bags—was identified as the root cause of ongoing dust exceedances. Deposits inside a duct can hide a crack, pinhole or failed panel until the area is opened and cleaned.
If emissions remain high after a bag inspection, include inlet and outlet duct walls, transitions, expansion joints, hopper and casing seams, access doors, gaskets, tube sheet and clean-air-plenum leakage paths in the inspection plan.
A Practical Failure-Diagnosis Table
| Observed pattern | Likely direction to investigate | First corrective action |
|---|---|---|
| Local top wear or holes near the collar | Off-centre or aggressive pulse; tube-sheet distortion; poor top fit | Check pulse alignment/settings, tube sheet and collar construction |
| Vertical body wear at cage wires | Broken, corroded, rough or distorted cage; excessive cleaning stress | Remove and inspect the cage; adjust cleaning only after confirming the mechanical condition |
| Lower-side wear concentrated at one height | Tube-sheet, cage, bag-length or internal-clearance issue | Check collector geometry and compare bag/cage dimensions to the drawing |
| Ring-shaped lower break | Abrasive dust or high local velocity spreading an initial defect | Review inlet flow, velocity, dust abrasion and bottom protection |
| Stiff, coated or blocked bag | Condensation, sticky dust, weak cleaning or unsuitable surface | Review temperature history, dew point, dust properties and cleaning performance |
| High emissions with no repeat bag damage | Duct, casing, door or panel leak | Inspect and clean the gas path before assuming media failure |
What to Send for a Useful Replacement Review
The fastest way to avoid a repeat failure is to send evidence with the enquiry: photos of the damaged area inside and outside of the bag; photos of the matching cage, tube sheet and suspected contact point; bag dimensions and construction; cage measurements and surface condition; plus temperature, dust, moisture, gas, cleaning and differential-pressure information.
These details help separate a material-selection question from a mechanical or operating correction. They also make it easier to specify industrial dust filter bags, filter fabrics and cages as one matched filtration assembly.
Need a Filter Bag Failure Review?
Send photos of the removed bag, cage, tube sheet and damaged area, together with dimensions and operating conditions. Pinnacle Filter can help identify whether the first correction should be cage replacement, construction change, operating adjustment or a different media direction.
Next step
Check the baghouse before changing bags
Cage fit, cleaning method, tube-sheet condition or repeated damage may affect the replacement result. Review the baghouse system first.